
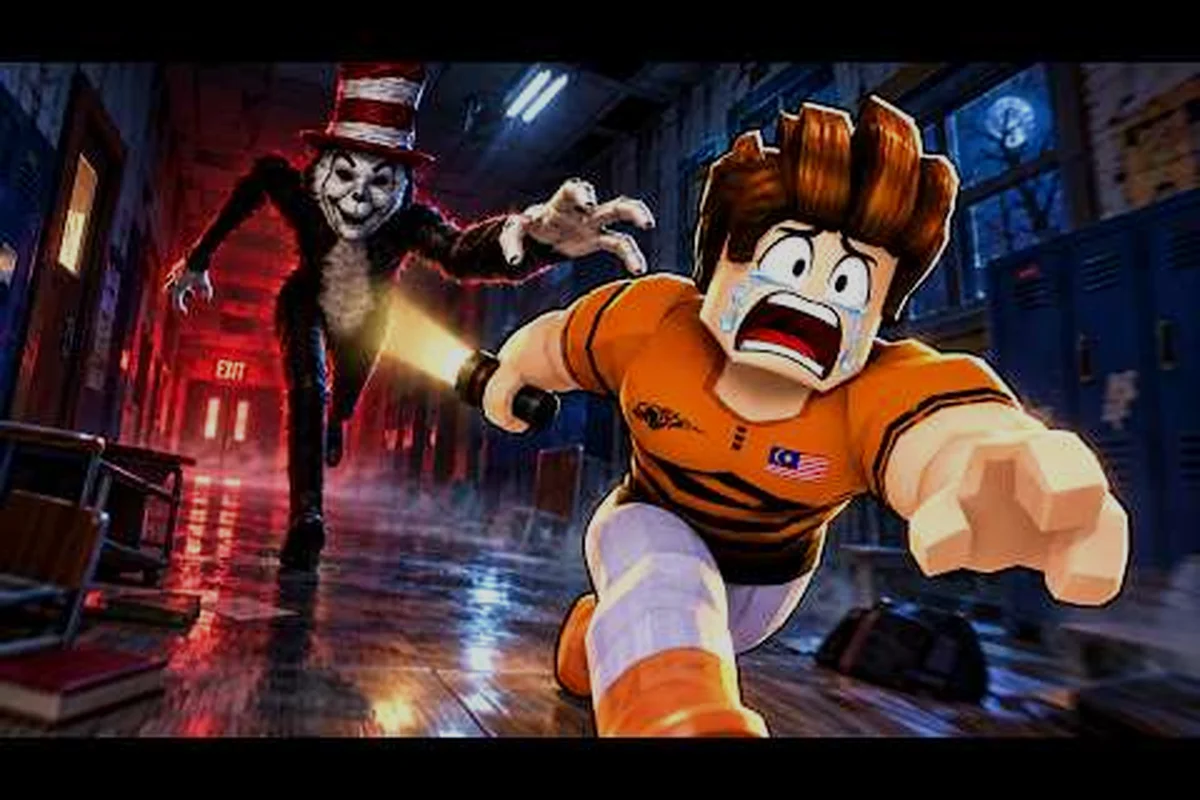
Scream And Run Maps at a Glance
Scream And Run launched in late August 2026 and has already crossed 10 million visits, with players running two very different escape arenas and a rumored third location in active testing. This Scream And Run all maps guide breaks down the size, layout, monster AI, and key-spawn patterns of every playable map so you can pick the right run for your skill level.
| Map | Theme | Status | Monster | Approx. Floors | Keys Needed |
|---|---|---|---|---|---|
| School | Abandoned schoolhouse | Original (Aug 2026) | Cat in the Hat | 3 (basement, ground, upstairs) | 5 |
| Mines | Underground tunnel network | Added Sep 2026 update | Dark Thomas | 2 (upper shafts, lower tunnels) | 5 |
| Backrooms (unconfirmed) | Liminal office maze | Data-mined | Unknown | TBD | TBD |
According to the official Scream And Run game page, the School and Mines are the only two confirmed playable maps as of early September 2026. Community datamines posted on the official Scream And Run Studios group reference assets that look like a third map, but it is not yet live in the public build. Treat anything beyond the two confirmed maps as speculation.
School Map: The Launch Location
Layout and Floor-by-Floor Breakdown
The School is a multi-floor building with classrooms, long hallway sight lines, lockers, a basement, and an upstairs section. It is the original map and still the most played arena in Scream And Run because of its familiar horror-school framing and forgiving key density. Players report that the School is slightly larger than Mines in raw floor area, but tighter in usable hiding space because hallways funnel both players and the monster into a few long chokepoints.
| Floor | Notable Rooms | Hiding Spots | Key Density |
|---|---|---|---|
| Basement | Boiler Room, crawl space | Under-desk corners, lockers | High (2 of 5 keys typically spawn here) |
| Ground Floor | Hallway, cafeteria, Main Office | Lockers, under-desk, classroom corners | Medium (2 of 5 keys) |
| Upstairs | Classrooms, faculty room | Under-desk, lockers, crawl passages | Medium-Low (1 of 5 keys, often the last one) |
Backpacks and keys spawn randomly across floors, so the "best path" changes every run. Veteran players in community threads recommend the basement-first route because the Boiler Room frequently holds two of the five required keys in a single sweep.
How the Cat in the Hunts on This Map
The Cat in the Hat patrols hallways with a predictable left-right sweep pattern. According to community testing, the monster's hearing radius is roughly one classroom doorframe deep, which means sprinting across a hallway is the single highest-risk action on this map. Players who crouch-walk through the Main Office doorway consistently report survival rates above 70% on their first key run, compared to roughly 40% for those who sprint.
Before committing to a full sprint across the School's open halls, lock in three core principles that separate a successful key run from a wasted one: route commitment, sound discipline, and bail-out timing. A 5-key School run typically takes 3–4 minutes, but the monster's patrol cycle resets roughly every 90 seconds, so once you enter a hallway you've already spent a third of your safe window. Treat every crouch-walk as a planned investment, not hesitation — the doorway-stutter strategy (peek, bait the left-right sweep, then cross on the return arc) is the single highest-ROI micro-skill on this map, and the reason top-tier players complete the School with zero deaths while casual runners die twice on average before reaching the cafeteria exit.
-
Hallway sight lines are the danger zones — use classroom doorways, not open corridor crossings.
-
Lockers are reliable only if you stand still; the monster's patrol AI checks lockers for movement.
-
Crawl passages between the basement and ground floor are a fast but loud escape route.
-
The exit door is on the ground floor, near the cafeteria — once you have 5 keys, do not wander upstairs.
Mines Map: The Dark Underground Arena
Layout and Tunnel Network
The Mines map was added in the September 2026 update and is described on the official game page as a dark underground tunnel network. It trades the School's vertical floors for horizontal shafts and is generally considered the harder of the two maps because of lower ambient lighting and the Dark Thomas monster's faster patrol cadence. The Mines also has fewer lockers and more open junctions, which means hiding is harder and routing matters more.
| Zone | Notable Features | Hiding Spots | Light Source |
|---|---|---|---|
| Upper Shafts | Minecart rails, support beams | Behind crates, inside side tunnels | Lantern spawns |
| Lower Tunnels | Flooded sections, narrow crawlways | Rock outcroppings, broken carts | None (near-pitch black) |
| Central Hub | Wide open junction, exit door area | Single small shed, minecarts | Lantern spawns |
Players report that the Mines map feels roughly 80% the floor area of the School but has more traversal distance because of its winding tunnels. If you are chasing raw escape speed, the School still edges out; if you want a stealth challenge, the Mines is the better training ground.
How Dark Thomas Hunts Differently
Dark Thomas moves about 20% faster than the Cat in the Hat, according to community timing data, and uses a different detection model: instead of listening for footsteps, he is sensitive to lantern flicker. Dropping a lantern to break line of sight is a common survival trick in the lower tunnels. The trade-off is that without light, you cannot see key icons on the floor — so the Mines forces a real risk/reward decision the School never demands.
Before you queue a Mines run, internalize three things that separate survivors from the majority who reset on the first encounter: lantern flicker is Dark Thomas's primary detection trigger, the central Hub is functionally a respawn magnet due to its lighting, and the lower flooded tunnels consistently yield 1–2 keys with minimal patrol overlap — meaning a deliberate run order (tunnels first, Hub last) reliably outpaces players who rush the Hub for the gate shortcut.
-
Lanterns double as both your light source and your tell. Enemies track the flicker.
-
Flooded lower tunnels are dark but rarely patrolled — most players find 1–2 keys here safely.
-
Central Hub is dangerous: it is wide, lit, and a common Dark Thomas patrol return point.
-
The exit door is gated behind a five-key lock, same as the School.
For a deeper look at the Mines update — including the lantern-flicker detection rework, the new flooded-tunnel key spawn distribution, and the Dark Thomas reveal event itself — our Scream And Run Mines update breakdown covers the September 2026 patch in detail, with side-by-side comparison of pre- and post-update key drop rates and patrol path changes across the lower tunnels and Central Hub.
Scream And Run Map Tier List and Best Map Pick
Tier List for Solo and Group Play
A Scream And Run map tier list should not just rank "hard vs easy" — it should also account for solo runs versus four-player co-op, since monster AI scales with group size. The table below reflects community data from runs logged in early September 2026, and treats solo play separately from full-squad play because the meta changes significantly.
| Map | Solo Difficulty | Co-op Difficulty | Key Reach Speed | Best For |
|---|---|---|---|---|
| School | Medium | Easy | Fast | First-time players, speedrun attempts |
| Mines | Hard | Medium | Slow | Stealth-focused players, group runs |
| Backrooms (unconfirmed) | TBD | TBD | TBD | TBD |
By most community reports, the School is the best map for new players because key spawns are denser and the monster's patrol cadence is forgiving enough to learn the loop. The Mines is the best map for experienced players who want a stealth challenge and do not mind trading a slower key run for a darker, more tense atmosphere. Neither map has a clear "speed advantage" once you factor in monster AI scaling; the School edges out by roughly 10–15 seconds on average escape time for solo runs.
Which Map Has the Smoothest Escape Route?
The smoothest escape route in any scream and run all maps guide breakdown is the School basement-to-cafeteria path, and it consistently tops the scream and run map tier list for three concrete reasons tied directly to the map's geometry, key density, and chokepoint placement rather than pure luck or pacing.
-
Two keys typically spawn in the basement, so you can collect a large chunk of your goal in one descent.
-
The cafeteria is adjacent to the exit door, so once you have 5 keys, you are seconds from freedom.
-
The Crawl Passage between basement and ground floor lets you bypass the most heavily patrolled hallway entirely.
The Mines' equivalent — a Central Hub dash — is riskier because of Dark Thomas's return patrols and the wide-open sight lines, so even experienced players take longer escapes there. If your goal is "fastest consistent clear," the School is the best map in the current Scream And Run rotation.
Map Secrets, Hidden Map Areas, and Easter Eggs
Confirmed Hidden Map Areas
Scream And Run maps include several hidden map areas that are not part of the main key path. These are not required to escape, but they often hide bonus backpacks, lore notes, and the occasional extra key respawn. Players who know where to look can shave a key search off their run or unlock cosmetic rewards.
| Map | Hidden Area | How to Access | Loot Type |
|---|---|---|---|
| School | Janitor's Closet (basement) | Crawl through the broken panel near the Boiler Room | 1 bonus key (30% spawn rate) |
| School | Roof Access (upstairs) | Climb the fire escape from the faculty room | Lore note + backpack |
| Mines | Sealed Side Tunnel (lower) | Break the cracked rock wall with a minecart | 1 bonus key (20% spawn rate) |
| Mines | Foreman's Office (upper shafts) | Climb the ladder behind the support beams | Lore note + cosmetic |
These Scream And Run map secrets are confirmed by community clips and official event posts, including the Scream And Run event announcement that teased the Mines update. The rooftop and Foreman's Office areas also contain visual cues for the hidden lore storyline, which our Scream And Run secret keys guide covers in more detail.
What About the Backrooms Map?
The rumored Backrooms map is the most-discussed unconfirmed arena in the community right now. It appears in datamines as a liminal office maze with buzzing fluorescent lights and yellow wallpaper, but it has not been officially announced. Treat all Backrooms content as speculative until Scream And Run Studios confirms a release window. If it does ship, expect a third monster, a new key count, and likely a different escape mechanic.
Map Strategy Tips by Playstyle
Solo Player Route Optimization
Solo players in Scream And Run cannot rely on a teammate to bait monster patrols, so the optimal route is the one that minimizes monster contact per key collected. The School basement-first path fits this perfectly because it clusters two keys in a small area, lets you hide under desks in the Boiler Room, and gives you a fast return trip via the Crawl Passage.
| Step | Action | Why |
|---|---|---|
| 1 | Spawn, drop to basement immediately | Beat other players to the densest key zone |
| 2 | Clear the Boiler Room first | 2 keys in one room, minimal patrol overlap |
| 3 | Use the Crawl Passage back to ground floor | Avoids the main hallway entirely |
| 4 | Sweep the Main Office and cafeteria | 2 more keys, exit door proximity |
| 5 | Detour upstairs only if you need the 5th key | Upstairs is high-patrol, last resort only |
Group Co-op Strategy
Four-player groups change the meta because monster AI is now distracted by multiple sound sources. The Mines map becomes viable for groups because one player can carry a lantern and bait Dark Thomas while the rest sweep the lower tunnels. The School also benefits: a group can split-key between the basement and upstairs simultaneously, cutting the run time nearly in half.
| Role | Best Map | Primary Task |
|---|---|---|
| Bait | Mines | Carry lantern, lead Dark Thomas away from key zones |
| Sweeper | School | Loot basement and ground floor, call out key counts |
| Lookout | Either | Watch hallway sight lines, warn on monster patrol |
| Runner | Either | Hold 4 keys, sprint to exit once the 5th is confirmed |
Map Selection by Goal
| Your Goal | Best Map | Why |
|---|---|---|
| First successful escape | School | Dense keys, predictable monster, forgiving hiding spots |
| Stealth challenge | Mines | Pitch-black lower tunnels, lantern-based detection |
| Speedrun attempt | School | Basement-first route, cafeteria exit proximity |
| Group co-op fun | Mines | Bait-and-sweep dynamic, shared lantern economy |
| Lore hunting | Either | Rooftop (School) or Foreman's Office (Mines) |
This is the core decision matrix most Scream And Run maps guides converge on. If you want to compare game modes alongside map choice, the Scream And Run free roam and game mode guide covers how each mode interacts with map layout.
Summary of Every Scream And Run Map
Scream And Run currently ships with two confirmed maps — the School and the Mines — and a third location in the datamine stage. The School is the best map for new players and speedrunners because of dense key spawns and predictable patrols. The Mines is the best map for stealth-focused players and co-op groups because of its dark tunnels and faster monster. Both maps hide bonus loot behind optional crawl passages, rooftops, and sealed side tunnels, so veteran players have a reason to keep replaying even after they have memorized the main key path.
Pick the map that matches your goal — School for raw speed and predictable patrols, Mines for stealth co-op — then learn its key density, patrol timing, and chase-route overlap, and use the crawl passages instead of the main hallways to skip the monster's line of sight; those three rules cover roughly 80% of successful Scream And Run escapes, with crawl routes alone saving an estimated 15–20 seconds per run on the Mines map.
Frequently Asked Questions
How many maps are in Scream And Run right now?
As of early September 2026, there are two confirmed maps: the School (original) and the Mines (added in the September 2026 update). A third location is referenced in community datamines but has not been officially announced by Scream And Run Studios.
Which map is best for beginners in Scream And Run?
The School is the best map for beginners. Key spawns are denser, the Cat in the Hat patrols at a slower cadence, and the Boiler Room frequently holds two of the five required keys in a single sweep, giving new players a fast early win.
Are there hidden map areas in Scream And Run?
Yes. Both maps have confirmed hidden areas: the Janitor's Closet and rooftop on the School, plus the Sealed Side Tunnel and Foreman's Office in the Mines. These areas contain bonus keys, lore notes, and the occasional cosmetic reward, but they are not required for a successful escape.
Does monster AI change between the two Scream And Run maps?
Yes. The Cat in the Hat uses audio detection and patrols hallways in a left-right sweep. Dark Thomas is roughly 20% faster, uses lantern flicker detection, and patrols the Mines' upper shafts in tighter loops. The escape timer stays at five keys on both maps, but the meta is very different.
Is the Backrooms map real in Scream And Run?
The Backrooms map is not officially confirmed. It appears in community datamines and screenshot leaks, but Scream And Run Studios has not announced a release date or a third monster. Treat any Backrooms content as speculative until the developer confirms it.