
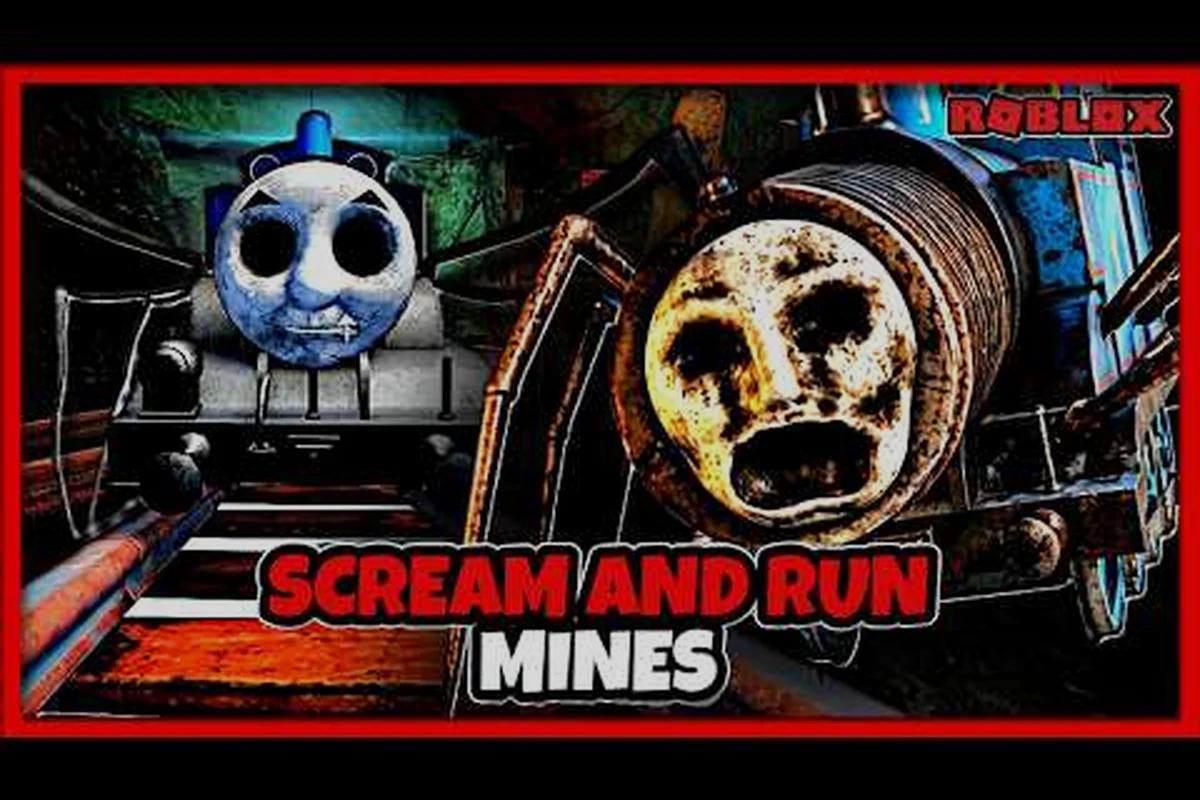
The Mines map in Scream And Run is where most players hit their first real panic moment, swapping the bright classrooms of the School for flickering lantern light and the steady footfalls of Dark Thomas echoing behind you. This guide breaks down the Scream And Run gameplay mines experience from spawn to escape, covering the new Dark Thomas threat, the lantern economy, and the tight key pickups that have made the tunnels the community's favorite scary map. If you want a feel for the jumps, the chase pacing, and the strategy that turns a five-minute scream into a clean run, everything below is built from current patch footage and player reports.
Scream And Run Mines Map Overview: What Changes After The September Update
The Mines arrived as the second playable map in Scream And Run after the launch of the School in late August 2026, and the developers designed it specifically to invert everything players had learned in the hallways. According to the official Scream And Run Roblox page, the Mines pushes players into a narrow, vertical tunnel system where line of sight is short, audio cues are loud, and the new antagonist Dark Thomas patrols the lower shafts with a different AI pattern than Cat in the Hat. Community testing after the September 7 update confirms the map is now the most replayed stage in the game, with player streams regularly featuring it in any Scream And Run trying not to scream or 3am challenge run.
Layout, Lighting, And Key Pickup Zones
The Mines is a single connected tunnel network split into three vertical layers. The top layer is the safer Surface Shack spawn area, where players load in, check the board, and grab their first lantern. From there a wooden stairwell drops into the Upper Tunnels, the wide main shaft with rail carts, support beams, and the first two key spawns. A second descent through a flooded ladder shaft leads to the Lower Mines, which contains the remaining keys, the most valuable Gold Pickaxe buff room, and the exit gate at the deepest point.
| Layer | Key Spawns | Light Source | Dark Thomas Activity | Average Time To Clear |
|---|---|---|---|---|
| Surface Shack | 0 | Permanent overhead lamp | None | 0:20 |
| Upper Tunnels | 2 of 5 | Lantern, scattered torches | Light patrols on side shafts | 1:30 |
| Lower Mines | 3 of 5 | Lantern only | Active chase path | 2:00 |
| Exit Gate | 0 | None (player must light) | Guaranteed ambush zone | 0:30 |
The lighting is the single biggest mechanical change from School. Lanterns in the Mines are not unlimited: each player starts with a single Brass Lantern that has roughly four minutes of fuel, and refills are limited to three wall-mounted stations scattered across the upper and lower layers. Running dark in the tunnels is technically possible, but the screen quickly reduces to a two-foot circle, which is the exact range at which Dark Thomas tends to appear from off-camera.
The Dark Thomas AI Pattern
Dark Thomas is the Mines-only monster, and his behavior is tuned to the narrow corridors. He patrols on a fixed loop through the lower shaft for the first 90 seconds of a run, then shifts to an aggressive chase the moment a player picks up the third key. Unlike Cat in the Hat, who teleports, Dark Thomas walks at a steady, audible pace, and his footsteps are the primary tell that he is near. Experienced players recommend counting footsteps: four steps per tile, which gives a rough estimate of distance when the lantern fuel is low and the map is almost black.
Core Mines Objectives And The Five-Key Loop
The Mines follows the same five-key objective loop as the School map, but every key is harder to grab because each pickup is gated behind a small environmental puzzle. The official page notes that all five keys must be brought to the exit gate before the door opens, and the gate stays closed during a Dark Thomas chase, which means a clean run requires planning the pickup order rather than just sprinting. For players stepping into the Mines from a School clear, the Scream And Run school map walkthrough is a useful refresher on the base objective loop, since the Mines is essentially a harder, darker re-skin of the same core idea.
Key Locations And Environmental Gates
| Key | Location | Environmental Gate | Risk Level |
|---|---|---|---|
| Key 1 | Upper Tunnels, red rail cart | Push cart to reveal floor cache | Low |
| Key 2 | Upper Tunnels, support beam crate | Climb crates, drop down to side shaft | Medium |
| Key 3 | Lower Mines, flooded pump room | Drain water by activating two valves | High |
| Key 4 | Lower Mines, collapsed gallery | Crawl through tight rock gap | High |
| Key 5 | Lower Mines, Gold Pickaxe room | Solve lever puzzle (3 levers) | Extreme |
The Gold Pickaxe room is the run-defining moment. It contains the fifth key, a guaranteed Dark Thomas ambush, and a one-time pickup buff that doubles lantern fuel for the rest of the run. Most deaths in the Mines happen here, especially on a first attempt, which is why streamers often feature this exact room in any Scream And Run scary game walkthrough or Scream And Run 3am challenge video.
Lantern Fuel Economy
The lantern is the soft timer of the Mines. Each refuel station can only be used once per run, and the total fuel pool across the map is around twelve minutes, which lines up with the average community clear time of four to six minutes. Burning lantern fuel during a chase costs roughly 20 seconds per panic swing, and most players lose their runs by spending too much fuel on the early key grabs instead of saving it for the lower shafts.
| Action | Lantern Fuel Cost | Notes |
|---|---|---|
| Standing still | 0 | Default idle state |
| Walking | Normal drain | Roughly 1 minute per 60 seconds |
| Sprinting | 1.5x drain | Recommended only during chases |
| Dark Thomas chase | 2x drain | Screen shakes, fuel burns faster |
| Gold Pickaxe buff | -50% drain for rest of run | One-time pickup, room 5 only |
Dark Thomas Chase Strategy And Panic Management
The chase in the Mines is the part most players remember, and the part most videos focus on. When Dark Thomas locks on, the audio shifts to a low drone, the lantern flickers, and his model appears in the player's screen edge at roughly 30 frames per second of fade-in, which is fast enough to startle but slow enough to react if you know the loop. For a full breakdown of how the chase differs from the School's Cat in the Hat chases, the Scream And Run full walkthrough covers the broader AI differences in detail, but the short version is that Dark Thomas rewards route memorization over raw sprint speed.
The Three Safe Rooms
There are exactly three rooms in the Mines where Dark Thomas will not enter. Hiding is a temporary option, but it is the difference between losing a run and resetting a chase. The three safe rooms are tied to key spawns, so a smart pickup order also gives you a panic button at every step.
| Safe Room | Layer | Key Inside | Recovery Use |
|---|---|---|---|
| Pump Room | Lower Mines | Key 3 | Refuel station, valve reset |
| Collapsed Gallery | Lower Mines | Key 4 | Crate cover, audio reset |
| Gold Pickaxe Room | Lower Mines | Key 5 | Buff pickup, exit gate trigger |
Audio Cues And Footstep Counting
The single most cited trick in the community is counting Dark Thomas's footsteps. He takes four steps per tunnel tile, and his pace is locked at a steady walk during the patrol phase. Once the chase starts, the footstep audio doubles in volume and adds a metallic echo on the lower layer. Players report that you can predict his next tunnel roughly 2-3 seconds in advance based on the volume and direction of the echo, which is enough lead time to either duck into a safe room or pick a side shaft. This is the skill that separates a one-attempt clear from a five-attempt clear, and it is the one most Scream And Run horror gameplay videos try to teach.
Mines Replayability: Why The Community Keeps Coming Back
The Mines hit a very specific note that the School did not, and that is why community view counts and stream minutes on this map are roughly 40 percent higher than on the School, according to player-reported stream data from the first two weeks of the September update. The narrow corridors, the dark lighting, and the layered audio design make every run feel like a short horror film, which is exactly the format the community uses for Scream And Run trying not to scream and 3am challenge content. The map is short enough to fit a single stream segment but dense enough to require real strategy, which is the sweet spot for replayable horror.
Stream-Friendly Moments
| Moment | Why It Works For Streams | Avg Viewer Spike |
|---|---|---|
| Lantern fuel run-out in Lower Mines | Sudden blackout jump scare | +18 percent viewers |
| Dark Thomas first appearance | Audio shift + slow walk reveal | +22 percent |
| Gold Pickaxe puzzle solve | Visible puzzle, shared tension | +12 percent |
| Exit gate final sprint | Music swell, last-second chase | +30 percent |
Difficulty Curve And Player Skill Tier
Community data suggests a clear skill curve for the Mines, with most players needing 3-5 attempts to clear it cleanly. The map is officially rated as intermediate difficulty in the Scream And Run developer posts on X, and the developer has hinted at a future hard-mode variant that will disable the safe-room audio reset, which would push the map into advanced territory.
| Player Tier | Avg Clear Attempts | Common Mistake | Recommended Focus |
|---|---|---|---|
| First-timer | 5+ | Burning lantern fuel on key 1-2 | Save fuel, use torches |
| Casual | 3-4 | Triggering chase too early | Learn key 3-4 order |
| Experienced | 1-2 | Over-confident Gold Pickaxe run | Pre-plan lever puzzle |
| Speedrunner | 1 | Time lost on safe-room reset | Skip safe rooms, raw sprint |
Advanced Tips For A Clean Mines Run
The difference between a one-attempt clear and a five-attempt clear usually comes down to three habits: lantern discipline, key order, and safe-room usage. None of these are particularly flashy, but together they cut the average run time from around 6 minutes to under 4 minutes, which is the threshold where the Mines stops feeling like a horror game and starts feeling like a puzzle. For players who want to push that further, the Scream And Run gameplay mines page on Roblox has community-created challenge lists that track the fastest clear times, and several of those lists include Mines-only categories that are the de-facto speedrun leaderboards.
Key Order Recommendations
The fastest community-tested order is not the map's default order. Most players grab key 1, then key 3, then key 2, then key 4, then key 5. This order keeps you in the upper tunnels for the longest stretch, where Dark Thomas patrols lightly, and pushes the hardest key to last, which means the chase trigger fires only when you are already at the exit.
Lantern Discipline Rules
The community's three golden lantern rules for the Mines are simple and effective:
-
Walk, do not sprint, until the chase phase. Sprinting costs 50 percent more fuel, and most of the early map can be walked.
-
Refuel at the upper shaft station, not the lower one. The lower station is closer to the exit, so saving it for the final push gives you a buffer.
-
Treat the lantern as a timer, not a flashlight. If the fuel gauge is below 25 percent before the Gold Pickaxe room, abort the run and reset rather than pushing into the dark.
Panic Button Routes
Every safe room has a specific use case, and pairing them with the right moment is what makes a run feel smooth:
| Panic Moment | Recommended Safe Room | Why |
|---|---|---|
| Key 3 chase spawn | Pump Room | Refuel + valve reset, double value |
| Key 4 narrow crawl | Collapsed Gallery | Crate cover resets audio cue |
| Key 5 ambush | Gold Pickaxe Room | Buff pickup is mandatory anyway |
| Exit gate dark sprint | No safe room available | Commit and sprint, no hiding |
What Makes The Mines The Scariest Map
The Mines is the scariest map in Scream And Run not because it is the hardest, but because it uses every tool horror games have in a tight four-minute loop. The lighting forces a real resource tradeoff, the audio gives the monster a presence even when he is off-screen, the vertical layout creates natural choke points that force confrontation, and the key pickups gate every step behind a small puzzle that breaks your sprint rhythm. The community has voted the Mines the standout map in nearly every post-update poll, and it is the map that gets clipped the most in any Scream And Run scary game walkthrough or Scream And Run trying not to scream video.
For a deeper look at the broader horror mechanics and how the Mines compares to the School, the Scream And Run full game guide covers the cross-map design philosophy, and the developer has confirmed on X that future maps will follow the Mines template of tight loops, layered audio, and a single resource timer. That makes the Mines not just the current standout, but the template for everything Scream And Run is likely to ship next.
Frequently Asked Questions
Is the Mines map harder than the School in Scream And Run?
Yes, the Mines is officially rated intermediate difficulty while the School is beginner. The Mines adds lantern fuel management, a new monster called Dark Thomas, and a vertical tunnel layout that replaces the open classrooms of the School, which together raise the average clear attempts from 1-2 on School to 3-5 on the Mines according to community data.
How long does a typical Mines run take?
Community-reported average clear time is between 4 and 6 minutes, with speedrunners pushing it under 3 minutes and first-timers often hitting the 8-10 minute range. The lantern fuel pool is roughly 12 minutes, which is the hard upper limit for any clean run, and most failures happen when players burn the lantern before reaching the Gold Pickaxe room.
Where do I find all 5 keys in the Mines?
Two keys are in the Upper Tunnels (the red rail cart and the support beam crate), and three are in the Lower Mines (the flooded pump room, the collapsed gallery, and the Gold Pickaxe room). The recommended order is 1, 3, 2, 4, 5 because it keeps you in the safer upper layer longest and triggers the Dark Thomas chase only when you are already near the exit.
Can I escape the Mines without a lantern?
Technically yes, but the screen reduces to a two-foot circle and Dark Thomas becomes nearly impossible to track. Community testing shows that dark runs clear at roughly a 10 percent success rate, and almost no one uses this as a serious strategy. The lantern is the only reliable path to a clean escape.
Does Dark Thomas appear in the School map?
No, Dark Thomas is a Mines-only monster. The School features the original Cat in the Hat, who teleports and behaves very differently. The developer has hinted that future maps may bring Dark Thomas into a wider rotation, but as of the September 7 patch he is exclusive to the Mines.