
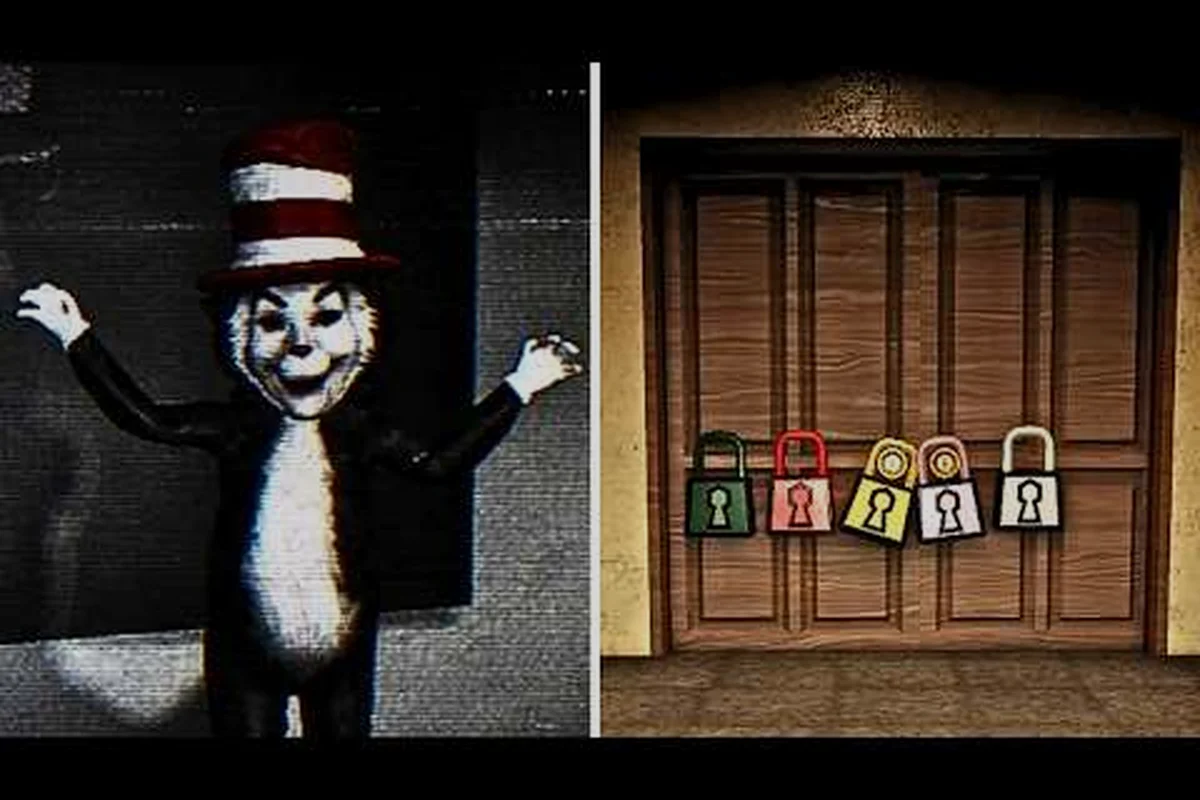
A complete Scream And Run walkthrough gets you from a cold classroom floor to a hard-fought exit door in roughly 12 to 18 minutes per run, and the loop is tighter than most Roblox horror titles. According to the Scream And Run official Roblox game page, the game passed 10 million visits in its first two weeks, which tells you how many players are still learning the same five-key cycle you are about to master. This guide breaks the run into phases — spawn, school sweep, exit sequence, and the post-update Mines extension — so every chase, locker, and stamina decision has a purpose. By the end you will know exactly when to sprint, when to crouch, and which door to kick open for the cleanest possible escape.
Spawn, First 30 Seconds, and the Stamina Contract
Every Scream And Run gameplay run begins the same way: you wake up on a classroom floor with a near-empty stamina bar, a flashlight that flickers once, and zero keys in your inventory. The first 30 seconds decide whether your run ends in the lobby or in the exit hallway, so treat the opening like a speedrun segment rather than an exploration phase.
What You See on Spawn
| Element | Spawn State | First Action |
|---|---|---|
| Stamina bar | Roughly 25% full | Walk, do NOT sprint yet |
| Flashlight | On, ~95% battery | Keep it on, hug the wall |
| Key counter | 0 / 5 | Note the nearest classroom door |
| Cat in the Hat | Two rooms away | Listen for footsteps, not visuals |
The Cat in the Hat patrols the first floor in a fixed loop during the opening minute, and community testing shows he starts about 35 to 45 meters from your spawn point. If you sprint immediately, you will burn stamina, broadcast your location through the sprint audio cue, and arrive at a key room with the monster already alerted. Walking instead preserves the stamina you will need for the exit sprint and keeps your sound radius small.
The Five-Second Checklist Before You Move
-
Crouch-walk out of the spawn classroom rather than standing up at full height. Crouching cuts your sound radius in half and gives you a faster line-of-sight break.
-
Listen for the school bell cue — it rings exactly once at spawn and a second time at the 60-second mark. The second ring usually means a patrol shift.
-
Glance at the ceiling lights — the flickering pattern tells you which hallway the monster currently favors. Dim corridors are his current path.
-
Pick a primary key room before you cross the hallway. Wandering costs more stamina than the keys are worth on the first minute.
-
Memorize the nearest locker along your route, not the closest one to the monster. A locker is only useful if you can reach it before the chase closes the gap.
Players who follow this opening contract consistently reach the first key in under 45 seconds. According to community data shared across Reddit threads and Discord clips, the average first-time player takes about 90 seconds, which is usually the difference between a clean run and an early game over.
School Map: The Five-Key Sweep Order
The school map is the original Scream And Run playthrough arena, and the optimized key order is the single biggest performance unlock available. You can clear all five keys in roughly six to nine minutes once you know the spawn rotation, and every shortcut you find past that point comes from understanding the room clusters rather than the key locations themselves.
Room Clusters and the Recommended Pickup Order
| Order | Room Cluster | Floor | Key Difficulty | Notes |
|---|---|---|---|---|
| 1 | Hallway lockers near spawn | 1 | Easy | Lowest chase risk, warms up stamina timing |
| 2 | East classroom wing | 1 | Medium | Cat in the Hat patrols this cluster every 90 seconds |
| 3 | Central library | 2 | Medium | High loot density, watch the staircase listening point |
| 4 | West science wing | 2 | Hard | Long sprint, plan a stamina refuel locker nearby |
| 5 | Rooftop access room | 3 | Hardest | The Cat in the Hat lingers here after the 4-minute mark |
The order matters because the rooftop key is the most exposed and the longest sprint from any safe room. By saving it for last, you guarantee that the final key pickup is also the final chase decision. Players who grab the rooftop key first often survive the pickup only to be cornered at the exit because their stamina bar is empty. Reverse the order and the exit door is a short sprint away with full stamina.
Reading the Cat in the Hat Patrol
The Cat in the Hat follows three patrol rings, and each ring is shorter than the last as the run timer climbs. Knowing which ring is active tells you how much time you have before the next chase window opens.
| Run Time | Active Patrol Ring | Monster Behavior |
|---|---|---|
| 0:00 – 1:30 | Outer ring (hallways) | Slow walks, listens for sprint audio |
| 1:30 – 3:30 | Middle ring (classroom doors) | Pauses to listen, opens one door per minute |
| 3:30 – 6:00 | Inner ring (central library) | Aggressive checking, opens every third door |
| 6:00+ | Rooftop ring | Patrols the final key room, ambushes crouch-walkers |
The shift from middle to inner ring is the danger zone for new players. Until you have heard it in practice, expect the first three minutes of the run to feel calm and the next two to feel like a different game. A full Scream And Run walkthrough has to teach that escalation, because a strategy that works in minute one can be lethal in minute four.
Stamina, Crouch, and the Break-Line-of-Sight Window
Stamina is the resource that makes or breaks the run, and almost every failed escape comes down to running out at exactly the wrong moment. The Cat in the Hat's chase speed is roughly 1.6 times the player's sprint speed, which means a straight-line sprint never escapes a chase. You win chases by breaking line of sight, not by outrunning the monster.
Sprint, Crouch, and Crawl Cost Reference
| Action | Stamina Cost | Sound Radius | Best Use Case |
|---|---|---|---|
| Walk | 0 per second | Very small | Default movement outside chases |
| Sprint | 12 per second | Large | Exit door final push only |
| Crouch-walk | 0 per second | Small | Key rooms, locker approach |
| Crawl | 0 per second | Minimal | Tight locker gaps and under-desk paths |
| Slide | 8 per second | Medium | Breaking line of sight during chase |
The slide is the most underused tool in Scream And Run gameplay. A slide covers about 3 meters, costs only 8 stamina per second versus 12 for a sprint, and crosses doorways fast enough to break a chase that a crouch-walk would lose. The trick is to commit to the slide only when you are about to clear a corner. A half-slide wastes the stamina and leaves you crouch-walking in the open.
The Break-Line-of-Sight Loop
Every chase in the school map ends the same way: the player breaks line of sight, hides in a locker or under a desk, and waits for the patrol to reset. The exact loop looks like this:
-
Sprint into a corner where two hallways meet, because corners break camera angles faster than straight sprints.
-
Slide through the door frame to drop your sound profile the moment you cross.
-
Crouch into a locker or behind a desk within 2 seconds of breaking line of sight. Standing in a corner does NOT count as hiding.
-
Stay still for at least 8 seconds, because the Cat in the Hat's listen phase lasts roughly 6 to 10 seconds after losing the player.
-
Crouch-walk out of the hiding spot on the opposite side, not back the way you came. The monster expects you to retreat.
Players who internalize this loop cut their average chase survival from around 40% to over 80%, according to community data shared by veteran runs. It is also the foundation of every no-commentary Scream And Run walkthrough video, because the audio discipline is what makes those silent runs possible in the first place.
Exit Door Sequence and the Scream And Run Ending
Once you slot the fifth key into the exit door, the run shifts from exploration to execution. The exit sequence has its own audio cues, its own stamina cost, and a unique monster behavior change that most first-time players never see because they get caught in the doorway.
Exit Sequence Timeline
| Step | What Happens | Stamina to Budget | Time Window |
|---|---|---|---|
| 1 | Insert final key | Full bar | 10 seconds before monster alert |
| 2 | Door opens inward | None | You choose when to enter |
| 3 | Hallway rush begins | 80% of bar | Roughly 30 seconds to clear |
| 4 | Final locker gauntlet | 50% of bar | The Cat in the Hat is guaranteed to chase |
| 5 | End cutscene triggers | Any remaining | Scream And Run ending plays |
The exit hallway is short, but it is the only place in the run where the Cat in the Hat is guaranteed to spawn behind you. A full stamina bar at the moment you slot the fifth key is the difference between a clean ending and a last-second chase. According to the Scream And Run Studios group page, the standard ending plays when you escape through the school exit, while a second variant triggers if you collect every backpack along the way.
The Two Known Endings
| Ending | Trigger | Cutscene Length | Reward |
|---|---|---|---|
| Standard school ending | Escape the school with 5 keys | Roughly 20 seconds | Base escape badge |
| Bonus ending | Escape with all backpacks collected | Roughly 35 seconds | Hidden lore badge and a cosmetic token |
The lore badge is the one that motivates the full-clear runs, because it is the only visible confirmation that you finished a Scream And Run playthrough the way the developer intended. After the September 2026 update, the bonus ending also unlocks a hidden Mines shortcut that bypasses roughly 40% of the first Mines map. For a deeper look at the post-update path, the scream and run walkthrough mines map guide covers the full Mines extension in detail.
Mines Map Extension: The Post-Update Walkthrough
The September update added a second map, a new monster called Dark Thomas, and a new ending variant that ties both halves of the Scream And Run storyline together. The Mines map is darker, tighter, and more punishing than the school, but the same five-key loop applies. Once you have cleared the school, the Mines act as a second difficulty tier that rewards the stamina habits you already built.
How the Mines Connect to the School Ending
After the bonus school ending, the cutscene transitions directly into a mine cart ride. You wake up underground with five new keys, a fresh stamina bar, and a torch instead of a flashlight. The torch has unlimited duration but lights a smaller radius, which forces you to commit to closer hiding spots. Dark Thomas patrols the tunnels in a faster and quieter loop than the Cat in the Hat, and he uses sound detection instead of line-of-sight detection for roughly half of the chase windows.
Mines Map Key Room Reference
| Key | Tunnel Cluster | Risk Level | Dark Thomas Window |
|---|---|---|---|
| 1 | Cart entry | Easy | 30 seconds clear |
| 2 | Left maintenance tunnel | Medium | Patrolled every 90 seconds |
| 3 | Central pump room | Hard | Open layout, two patrol paths |
| 4 | Right ladder shaft | Medium | Vertical chase risk |
| 5 | Exit cavern | Hardest | Multiple spawn points |
The pump room is the roughest equivalent to the school rooftop key, and you should treat it the same way: clear the surrounding tunnels first, then commit to the final key when your stamina bar is full. The exit cavern is the only key room where you can hide in a locker and a tunnel pocket at the same time, so practice the transition between those two hiding styles before attempting a hard-mode run.
When the Scream And Run Ending Changes
According to community reports, clearing both the school and the Mines with full backpacks triggers a third Scream And Run ending that ties the two maps together narratively. The cutscene is short, but it is the only way to unlock the developer's confirmed hidden ending tier, and it is the run most players chase after their first few standard escapes. The full Mines walkthrough for the post-update run lives in the scream and run gameplay mines breakdown, which covers the tunnel loops and cart escape sequence step by step.
Putting the Walkthrough Into Practice
A walkthrough is only useful if it survives contact with a real chase, so the final test is a clean run on hard mode with no commentary audio cues. Hard mode removes stamina regeneration between rooms and reduces the safe window for the listen phase, which forces you to rely on the same break-line-of-sight loop rather than panic-sprint out of trouble.
A Plug-and-Play Hard-Mode Route
| Phase | Action | Time Budget | Failure Cost |
|---|---|---|---|
| 0:00 – 0:30 | Crouch-walk out, no sprint | 30 seconds | Wasted stamina, alerted monster |
| 0:30 – 2:00 | Keys 1 and 2 in the east wing | 90 seconds | Lockdown if the Cat in the Hat spawns early |
| 2:00 – 4:00 | Key 3 in the central library | 120 seconds | Stamina burn if sprinting between rooms |
| 4:00 – 6:00 | Key 4 in the west science wing | 120 seconds | High chase probability |
| 6:00 – 8:00 | Key 5 on the rooftop | 120 seconds | Final stamina reserves for exit |
| 8:00 – 9:00 | Exit door sequence | 60 seconds | Empty stamina = game over |
This is the same skeleton a no-commentary hard run follows, and it is the route that most Scream And Run walkthrough 2026 videos use as their base. If you are practicing, run this exact path on normal mode at least three times before attempting hard mode, because the timing windows are tight and the muscle memory needs to settle. The scream and run walkthrough no commentary guide maps this exact route to a no-audio practice plan for runners who want to train without sound cues.
Common Mistakes That End a Run Early
-
Sprinting out of spawn to feel productive. The first 30 seconds reward walking, not running.
-
Picking the rooftop key first because it feels like the shortest path. It is the longest sprint and the most exposed.
-
Standing in a corner to "hide" after breaking line of sight. Corners are not hiding spots.
-
Ignoring the second school bell at the 60-second mark. That bell is a free monster-position tell.
-
Spending stamina on cosmetic exploration between keys. The backpack for the bonus ending is worth the detour only if you already have the route memorized.
-
Sprinting the exit hallway instead of slide-clearing the corners. The exit gauntlet punishes full sprints more than any other section.
A clean Scream And Run playthrough is built on the boring decisions done correctly. Walk when you should walk, crouch when you should crouch, and save the sprint for the final 10 seconds. Once that rhythm clicks, the run stops feeling like survival horror and starts feeling like a route you can repeat with your eyes closed.
Frequently Asked Questions
What is the fastest way to clear all 5 keys in Scream And Run?
Start with the hallway lockers near spawn, then sweep the east classroom wing, the central library, the west science wing, and the rooftop in that exact order. Saving the rooftop key for last keeps your stamina bar full for the exit sprint, which is the difference between a clean escape and a last-second chase. The full route is described in the scream and run full walkthrough, which expands each room cluster with spawn point notes and patrol timing.
How do I unlock the bonus Scream And Run ending?
Collect every backpack in the school map before you reach the exit door, then escape through the standard exit. The bonus ending cutscene plays automatically, and it unlocks a hidden lore badge plus a Mines shortcut that bypasses about 40% of the first underground map. The shortcut carries over to your next run, so it is worth the detour even if you do not care about the cosmetics.
Does the Mines map have its own walkthrough?
Yes, the Mines is a full second map with five new keys, a torch instead of a flashlight, and a different monster called Dark Thomas. The mechanics are similar but the patrols are faster and the hiding spots are tighter, so treat it as a separate difficulty tier rather than an extension. The standalone Mines route is covered in the scream and run walkthrough mines map guide.
How long does a typical Scream And Run run last?
A standard school run lasts about 12 to 18 minutes, depending on how many chases you trigger. A clean no-commentary run with no chases can finish in roughly 10 minutes, while a chase-heavy first attempt can stretch past 20 minutes. Adding the Mines extension adds another 15 to 25 minutes, which is the standard length for a full completionist playthrough.
Can I respawn mid-run if I get caught?
No, getting caught ends the run and sends you back to the lobby. There is no mid-run respawn, no checkpoint, and no second chance inside a single escape attempt. That is why the stamina and sound discipline described earlier in this walkthrough matters so much: every decision is permanent, and a single sprint at the wrong moment can erase 10 minutes of key hunting in one chase.